UniFi
UniFi Omada
Omada UISP
UISP
Your Hubox Omada Controller makes it easy to upgrade your device firmware. In most cases, a couple of clicks are all that's required. However, in some very rare cases, you may need to 'rescue' a failed upgrade with a manual upgrade via your controller GUI.
MSP style advice from enterprise network admins is to NOT be 'click-happy' - Click the Upgrade button with caution!
Method 1 - Wait for upgrade option
In Omada the firmware is loosely bound to the controller version you are running. It is by far our recommendation that you wait for the option to appear in your controller. You will see the option in the device view, like so. . .
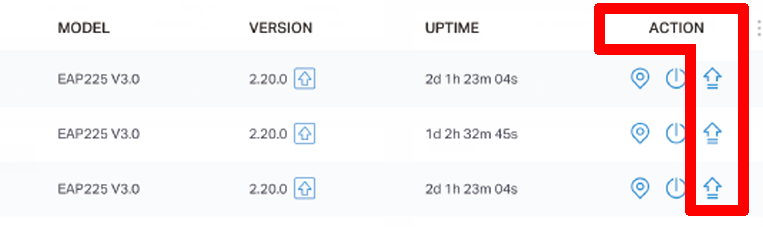
Click this and the upgrade process will begin. We strongly recommend not upgrading if your controller does not offer the option yet. If you need to upgrade for a specific reason, you can send a support request that your controller version be changed accordingly so that the option appears.
Method 2 - Manual upgrade via controller
If you are confident in your abilities to read through release notes, and you are sure upgrading manually is safe, it is possible to force a firmware version for specific devices on your network by uploading the firmware file directly via your controller.
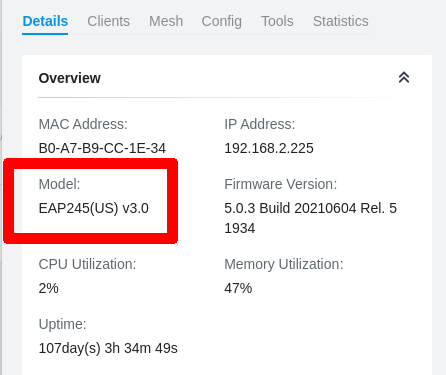
Firstly, check CAREFULLY the device models AND version number in the device overview. . .
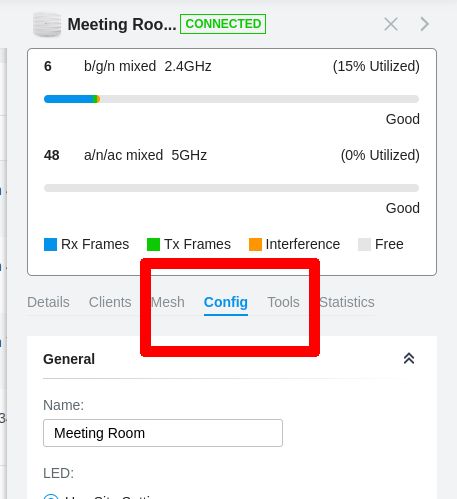
Go to the TP-Link website and search the downloads area for your model and version. Download the file and extract the .bin file from the zip you downloaded. Then, in your controller, go to 'Config'. . .
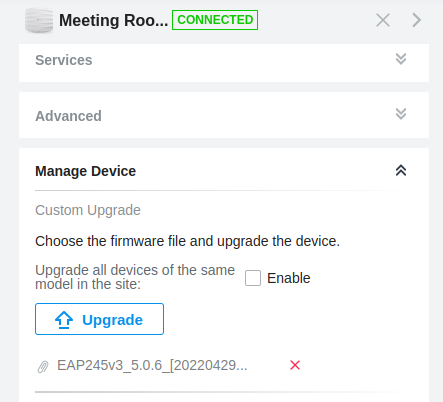
. . . and under 'Manage Device' browse to the .bin file. . .
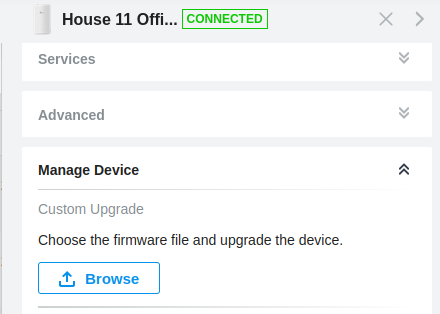
Then, click upgrade and the file will be uploaded to the device. . .
When the process is complete, you will see. . .

You're done!
Method 3 - Reset device and upgrade via standalone GUI
If something has gone wrong, or you are upgrading a defaulted AP before deployment, you can upgrade the firmware via the device standalone GUI. We do not recommend this IF the device is already adopted, but you may need this method in some circumstances.
First, download the appropriate firmware for your model and version number from TP-Link. Extract the .bin file from the ZIP. Prepare it on the device you will use to connect to the device.
The easiest way is to connect via the default WiFi signal being broadcast by the defaulted AP. The signal name will be printed on the device label. Launch a web browser after connecting and go to http://tplinkeap.net

Username and password are defaulted as admin/admin
Navigate to system --> Firmware Upgrade
Browse to the .bin file, and upgrade.